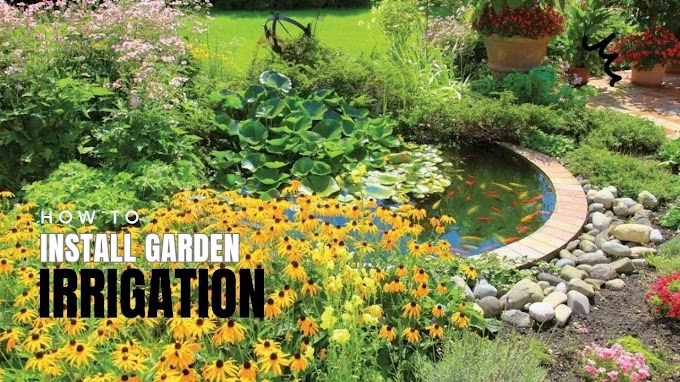
Gardena is a brand that specializes in the production of garden irrigation systems. Its products allow for easy, remote, and rational watering of the garden, which can greatly facilitate the care of plants, as well as save time and water. The company's irrigation systems include Sprinkler system pop-up sprinklers and Micro-Drip-System drip lines and various accessories that allow you to adjust the irrigation system to the individual needs and requirements of the garden.

If you are thinking about installing an automatic irrigation system in your garden, we have a practical video guide for you, from which you will learn step by step how to plan and implement the system and choose the right products, and most importantly - how to avoid mistakes and enjoy easy watering!
A well-designed and installed garden irrigation system is an extremely convenient solution that allows you to program watering so that it turns on at the right moment, providing plants with the right amount of water at the right time. Irrigation is precise and even, and most importantly - it can be perfectly matched to the current needs of plants.
Branded irrigation systems, thanks to the use of good quality materials, are characterized by high durability. This means that it is a one-time expense for many years! The wide range of applications of the systems and components ensures flexibility and versatility, making it ideal for any type of garden and any task - from watering large lawns and flowerbeds to rows of plants in greenhouses and potted plants.
Where to start planning automatic watering?
The design and installation of an automatic irrigation system can be done on your own, but it requires some experience and knowledge in order not to make mistakes, and thus expenses and nerves. For this reason, if we have not had contact with irrigation systems before or we do not feel strong enough to carry out design and installation work ourselves, it is best to use the help of a professional company.
In addition, to start planning an irrigation system at all, you should first of all:
adjust the irrigation system to the previously prepared concept (design) of the garden or planting vegetation;
measure the parameters (efficiency) of the water intake (using professional measuring devices or the so-called bucket test);
choose the right irrigation system adapted to the size of the garden and the needs of the plants.
MyGarden application - self-planning of the irrigation system
Once we have a garden design or concept and we know the efficiency of the water intake, we can start designing the irrigation system. At the beginning, it is worth using the help of Gardena experts, i.e. free planning and determining the necessary type of irrigation devices in a given garden.
However, when we decide to carry out the design and assembly ourselves, we can reach for the MyGarden application. Thanks to this easy-to-use program, it will be easier for us to plan the irrigation system and select and complete the necessary pop-up sprinklers for lawn irrigation or drip lines that rationally and efficiently water flowerbeds with plants.
Principles of designing automatic irrigation
The design of the automatic irrigation system must be based on the design/plan of the garden or planting plants on flowerbeds. In this project, we must highlight above all:
surfaces (spaces) in the garden that do not require irrigation (e.g. house, garage, pavement, etc.);
lawn surface and pop-up sprinklers;
all flowerbeds and plantings will be irrigated with drip lines.
The irrigation system (already at the design stage) can be divided into the so-called sections, i.e. sprinklers or drip lines that water together or independently, e.g. a lawn or flower beds or vegetable patches, etc. In addition, each section can be set (programmed) later in such a way that it works at a specific time and with a specific frequency.
The greater the water capacity of our water intake in the garden, the more sprinklers in the garden can work simultaneously, and the more sections or irrigation groups can or must be created. The number of scheduled pop-up sprinklers depends on the size and shape of the lawn, and the drip lines will depend on flowerbeds or groups of plants.
Sprinkler system – comfortable irrigation of the lawn
The first step will be earthworks, i.e. excavations along the planned lines of the irrigation system pipes, supplying water to the sprinklers. It is therefore important to remember to lead them in such a way that there are no collisions with other elements of equipment and garden development. Before starting excavation, it is a good idea to first place sprinklers in the planned places and start digging only when the field arrangement agrees with the project.
In addition to the sprinklers themselves, the key elements of the system is the solenoid valve boxes, which usually contain 2 or 3 such valves that control the water intake or shut-off. Installation of the valves in the box is quite simple and the whole can be assembled without special tools.

Special, plastic boxes, which are placed in the ground at the appropriate depth, contain a set of valves, as well as all the necessary elements for their assembly. It is best to use boxes with a bottom, placed at the appropriate depth on a layer of drainage (e.g. fine gravel).
Cables supplying electricity are connected to the boxes arranged in appropriate places. If the garden irrigation is planned to be divided into sections, e.g. irrigation of the lawn with sprinklers and separate irrigation of beds with drip lines, separate boxes are installed for each section with the appropriate number of solenoid valves. Boxes for solenoid valves are usually placed in places where there will be good and easy access to electricity and at the same time to connect irrigation wires (pipes) laid in excavations.
The stacked boxes with solenoid valves are connected to a special controller (located on the wall of the house or other building), which, based on the programmed frequency, turns the system on and off.
To avoid unwinding and twisting irrigation lines in dug trenches, it is best to lay them with two people. The laid wires are connected with the use of matching connectors and elbows, and the sprinklers themselves are best positioned at the edges and edges of the lawns, so that they can best water the area at the set angle (e.g. 180 °). If it is necessary to make a trench in a hard-to-reach place (e.g. at a curb or edge), you can use an additional, short section of the cable (" extension "), thanks to which we will slightly move the sprinkler away and connect it to the system at the same time.
When installing sprinklers, care should be taken to ensure that soil does not get into them and that they are not contaminated, which may affect their operation. After the pop-up sprinkler system has been installed and commissioned, the operating angle on the pop-up sprinklers must be precisely set using the adjustable rings, as well as the appropriate nozzle and the sprinkler working distance (adjustment on the top of the sprinkler).
Pipeline - water like electricity from the socket
Water intake boxes, i.e. the Pipe-Line system, allow for additional connection to the irrigation system, e.g. traditional surface sprinklers (or garden hoses) in various places in the garden using the so-called quick coupler.

The boxes are placed underground and connected to the system ducts wherever additional, quick access to water is needed. Inside the boxes, there is a hose connection (quick coupling), which automatically releases the valve and starts the water flow. The Pipie-Line system is a practical solution because thanks to it you do not need to develop additional garden hoses, so it is worth planning and installing water intake cans in each automatic irrigation system.
Micro-Drip-System - economical drip irrigation
Thanks to the arrangement of drip lines around the plants on flowerbeds, we can rationally manage water consumption and effectively irrigate the plantings. Unlike the pipes buried in the ground in the Sprinklersystem system, drip lines are laid on the surface, on already planted beds. Thanks to this, we can arrange them in such a way that thanks to the drippers placed on the cable, the water reaches the plants growing in the beds and slowly irrigates them - drop by drop.
To avoid twisting and unrolling the fold-out drip lines on flowerbeds, it is best to arrange them with two people. At the beginning of the drip line, a protection in the form of a pressure reducer is placed, and a plug is at its end. Laid drip lines are fixed to the ground with special pins. After laying the lines, you can cover or mask them with e.g. bark or other mulch. Micro-Drip System drip lines, like a pop-up sprinkler system, can be connected to the controller with solenoid valves and manage the frequency of irrigation.
Moisture sensor and Gardena Smart System app
To optimally adjust the frequency of watering to the needs of plants and current conditions, it is worth using a moisture sensor. Thanks to it, you can set a certain level of humidity below which the system will automatically start watering. The sensor can be placed anywhere in the garden and managed remotely, as well as the entire system.
Remote management of the irrigation system is possible after connecting a special device (the so-called gateway ), resembling a modem, to the home Wi-Fi network. Then, thanks to the free Smart System Gardena application, downloaded to your phone (smartphone), you can freely control the entire irrigation system in your garden, even when away from home (e.g. on vacation) - from anywhere in the world with access to the Internet.
System testing
After the system installation is complete, make sure everything is working properly. Run an irrigation test to make sure water is distributed evenly throughout your garden.
Testing an automatic watering system is crucial to ensure that the system is working properly and watering the entire garden evenly. Here are some steps you can take to test your irrigation system:
Check the timer settings
Make sure the timer settings match your preferences and that the timer is set to the correct watering times and days.Turn on the system.
Turn on the watering system to verify that water is flowing from the tips, fittings and other components of the system. Make sure all tips irrigate evenly and for the right amount of time.Check the water pressure
Make sure there is enough pressure to distribute the water evenly throughout the system. If the pressure is too low, the pipes or fittings may be clogged.Check the operation of the valves.
Make sure that the valves open and close properly. Verify that each valve operates independently of the others.Evaluate irrigation uniformity
Walk through the entire area to be irrigated and check that the water is evenly distributed. If you notice areas that are dry or overwatered, you will need to adjust your system settings or irrigation tips.Fix possible problems
If you notice any problems with the system, such as leaks, insufficient watering or too much water, fix them to keep the system running properly.
Testing your automatic watering system should be done on a regular basis to ensure that the system is working properly and watering your garden efficiently.